Drupal 8 and Drupal 9 Rest API tutorial and creating custom Rest API
In modern digital age, all applications will be having web services in order to communicate with other third party applications and devices. This is especially evident in the areas related to PHP development services. REST architecture is the mostly used technology to implement webservices. As an Enterprise content management system, Drupal 8 also provides Restful webservice module in its core modules in order to achieve third party integrations.
As an example, a popular usage of a REST interface is a mobile application that needs to read and write data from your site’s database.
As you already knows Rest Webservices are used to communicate to Application using HTTP methods such as POST GET etc. Here we are discussing about how we can configure Restful Webservice API module and other Rest resources and also how we can create custom Rest resources using our custom module.
Install postman to test rest API calls. You can also use Rest client Chrome extension.
Here I am dividing this article to below sections
- Expose view data as Rest export
- Creation of CSRF token for Basic authentication
- Post content and create a node using REST
- Submitting Files to node using Rest API
- Creating a custom Rest resource for Get method
- Creating a custom Rest resource for POST method
Enable the following modules: RESTful webservice, Serialization, HAL, and HTTP Basic Authentication.
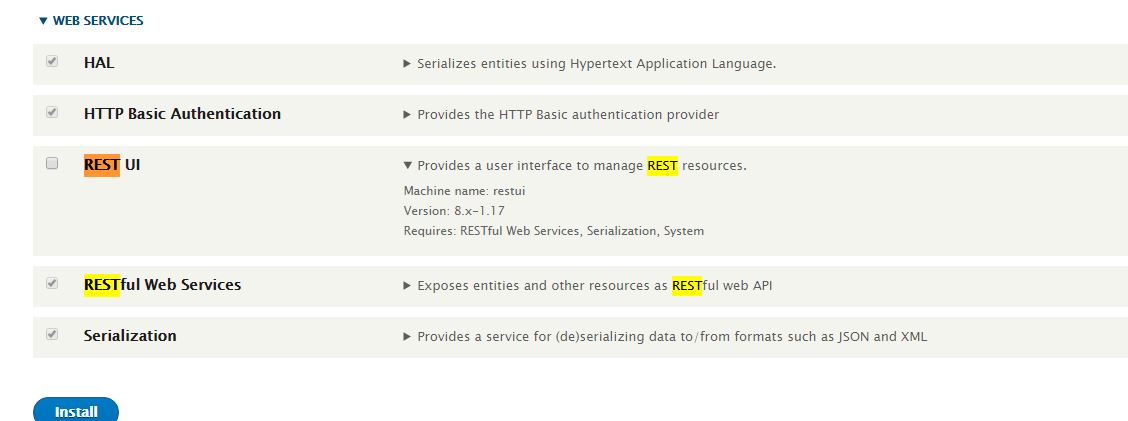
Rest UI
Download and install restui contributed module. This module provides easy to use UI in order to enable Rest resources and configure settings.
https://www.drupal.org/project/restui
after installing Rest UI , you can see below URL where you can manage resources.
http://YOUR_PROJ_PATH/admin/config/services/rest
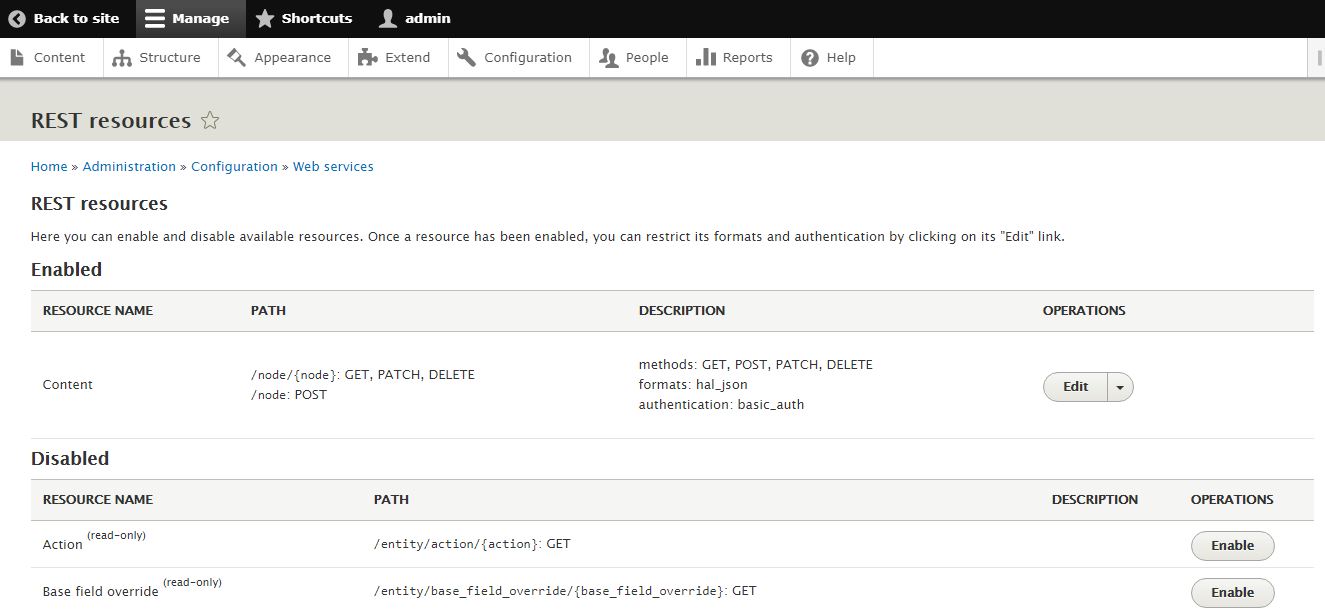
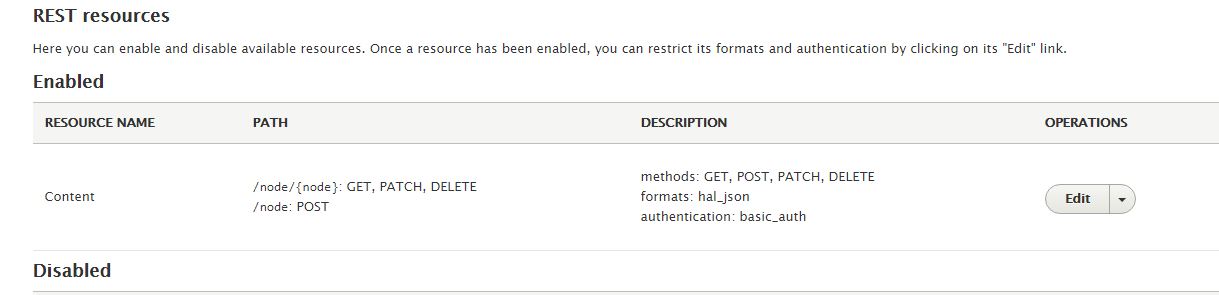
By default, the REST module enables the node entity resource for all GET, POST, PATCH, and DELETE operations. It supports basic or cookie authentication and the HAL or JSON formats.
Expose view data as Rest export
Now we just expose a view result using rest. We explain in detail about exposing different resources for each purposes.
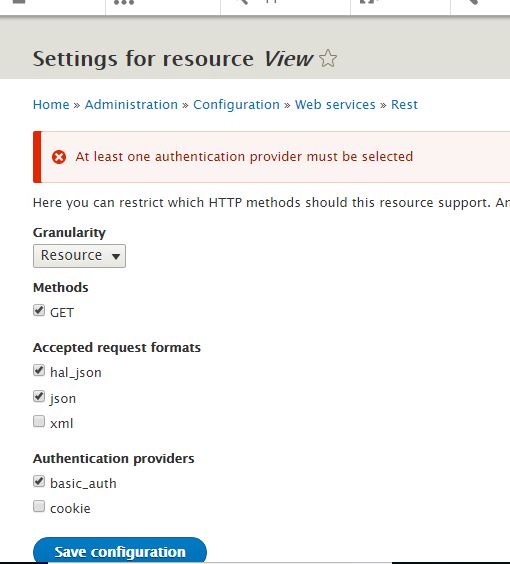
Enable view resource from the list

While click on enable you will see a resource setting page where you can configure various settings which include result format of data , request method and authentication as basic authentication.
In this Case we are just displaying data using a GET request.
See below settings for exposed recourse.
I will explain detail about using authentication in below in sections.
For using basic authentication we need to create user
http://localhost/digitalnadeemDrupal/admin/people/create
Here I am creating a user with username restuser and password restuser@123
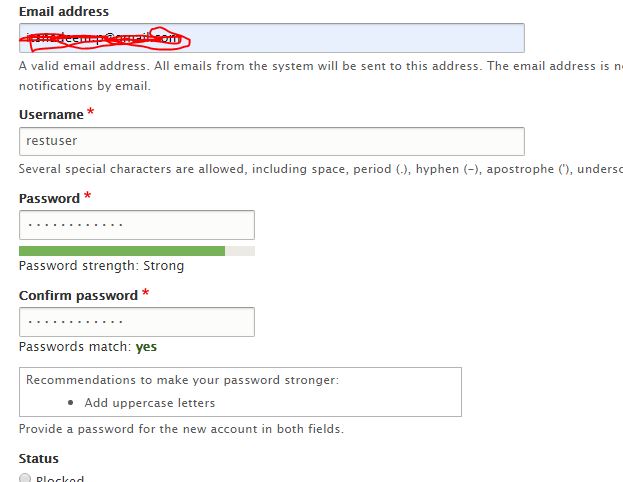
We can use this user to authenticate while calling rest API url
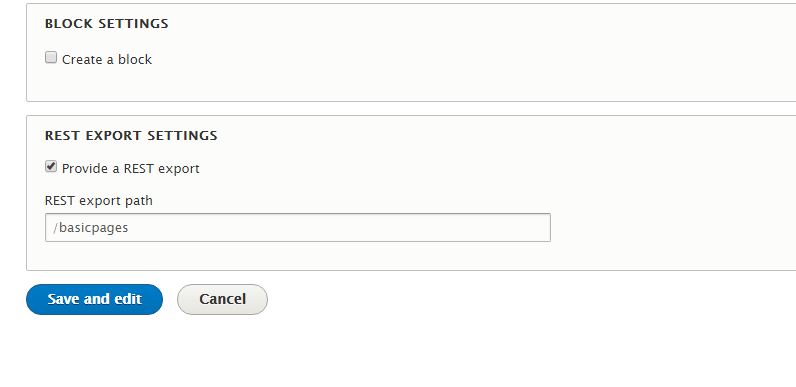
Create a view for any content type. Here I am creating view for Basic Page.
Select Rest export option and then provide a export path and click save button.
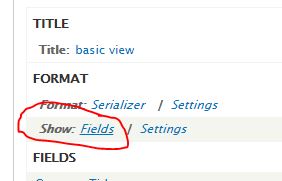
In views page select rest export tab if multiple displays are there.
Change Format section as fields
By click on settings you can place alias for each fields
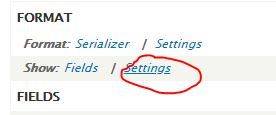
Pop up will show which lists all fields.
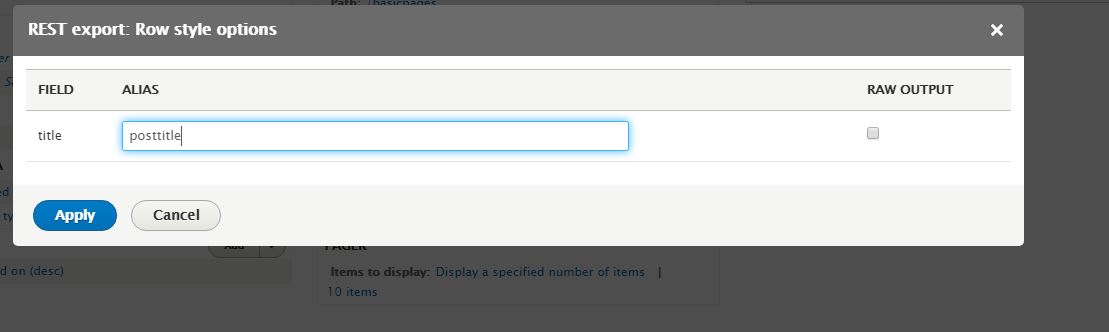
You can give your own alias name so that this will appear as keys in json responses.
Please see below respnose before and after changing alias of field title.
Before applying alias for title
[{"title":"\u003Ca href=\u0022\/digitalnadeemDrupal\/node\/1\u0022 hreflang=\u0022en\u0022\u003Etest\u003C\/a\u003E"}]
After applying alias for title
[{"posttitle":"\u003Ca href=\u0022\/digitalnadeemDrupal\/node\/1\u0022 hreflang=\u0022en\u0022\u003Etest\u003C\/a\u003E"}]
As of now we didn’t include any authentication. So we can directly call API as below. Please note you have to mention format at the end of URL .
http://localhost/digitalnadeemDrupal/basicpages?_format=json
so response will be as below.
[{"posttitle":"\u003Ca href=\u0022\/digitalnadeemDrupal\/node\/1\u0022 hreflang=\u0022en\u0022\u003Etest\u003C\/a\u003E"}]
Here digitalnadeemDrupal is my project folder
Creation of CSRF token
CSRF token is needed for Basic authentication. This token will be used to call other API end points which needs basic authentication.
Post URL is provided below. You can pass your rest user credentials in your request body.
Here I am passing my admin user credenrials
http://localhost/digitalnadeemDrupal/user/login?_format=hal_json
Request body
{
"name": "admin",
"pass": "admin123"
}
Response
 "current_user": {
"uid": "1",
"roles": [
"authenticated",
"administrator"
],
"name": "admin"
},
"csrf_token": "a4y_ZT_1RsM9RGWNWSq9PtjM5bUymSJyEMWPzcxPPa4",
"logout_token": "vORhZMKNlnd7pGlhfv8dBbFSlCFLQyrEhSj6xhJd7nU"
}
You can see your CSRF token in response key csrf_token.
Save this token and use this token for all rest resource access.
Please see below screen shot of Post man.
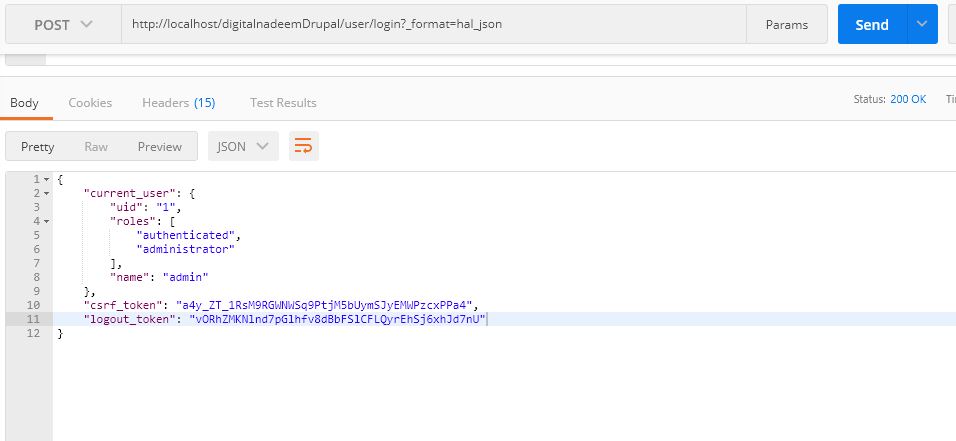

Here you got CSRF token. Use this token at header for basic authentication
Post content and create a node using REST
Next we are going to discuss how we are going to post a node data using Rest module
So first we are configuring resources in rest UI window.
As you can see below
before going to post with file , we are submitting with text fields.
In my basic page content type I have below fields.
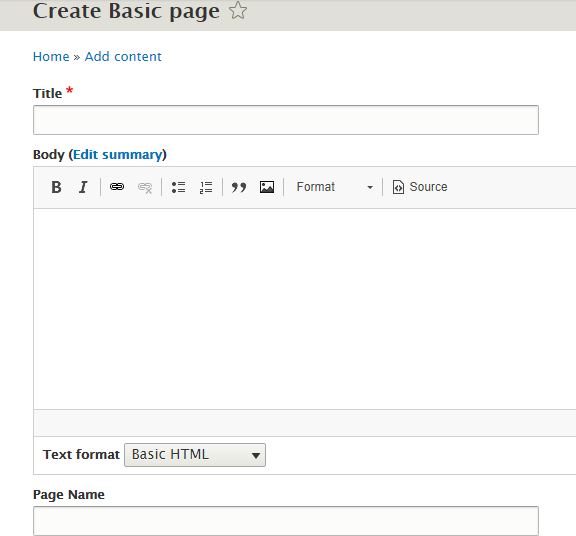
And now we are going to create a node of basic page using Rest API. So we are using post man to submit the data.
For creating node we need to use basic authentication. So as mentioned in previous step get your serf token.
I am using postman to post data. For posting content URL will be as below.
http://localhost/millid8/entity/node?_format=hal_json
create BasicAuth authorization using username and password
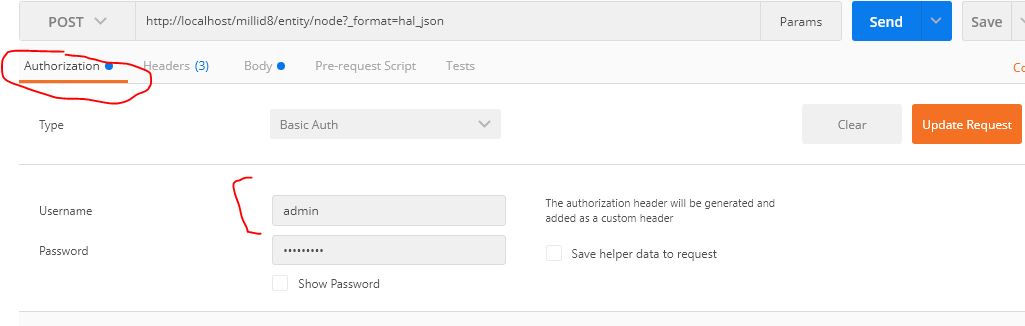
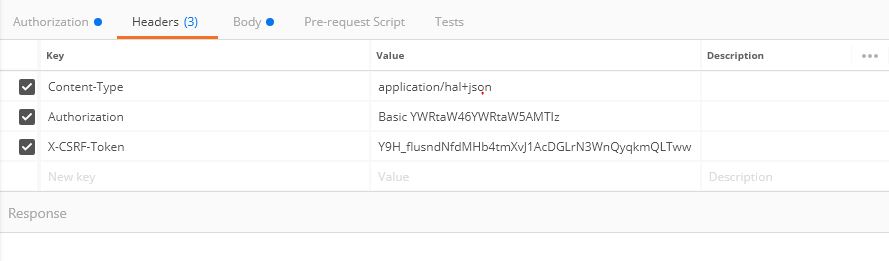
This create an entry in headers tab named Authorization.
Content-Type : application/hal+json
X-CSRF-Token : Y9H_flusndNfdMHb4tmXvJ1AcDGLrN3WnQyqkmQLTww
Add node data in content body select raw option.
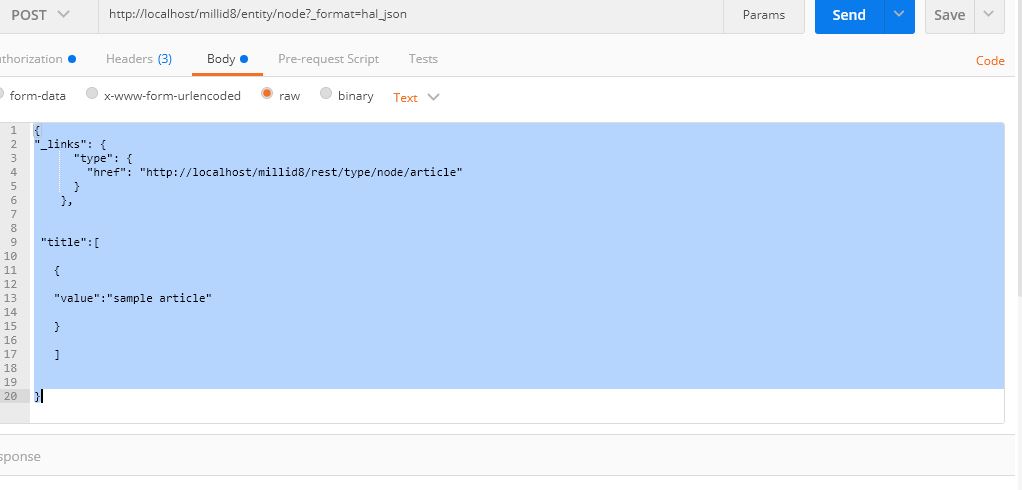
Here I am creating a article content with title ‘Sample article’.
{
"_links": {
"type": {
"href": "http://localhost/millid8/rest/type/node/article"
}
},
"title":[
{
"value":"sample article"
}
]
}
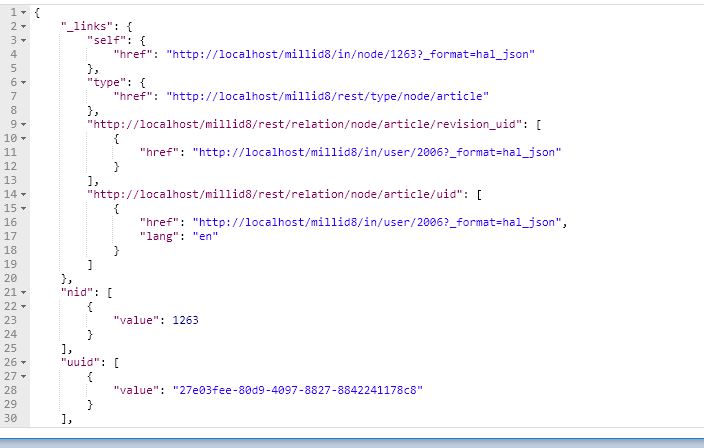
This will provide response with details of node created.
Submitting Files to node using Rest API
There will be situation where you have to create nodes with multiple files attached to it. We cannot create this with single Rest API end point. First we have to submit file and get f_id and details. Attach this f_id with body of node creation API.
For uploading files first we need to enable Files resources at Rest UI
Go to below URL
http://localhost/millid8/in/admin/config/services/rest

Also enable file upload resource plug-in.

After enable file resource confirm authentication and formats(hal_json, json) set.
Then create a content type and an image field which accepts images.
Here in my article content type I have an image which accepts multiple values.
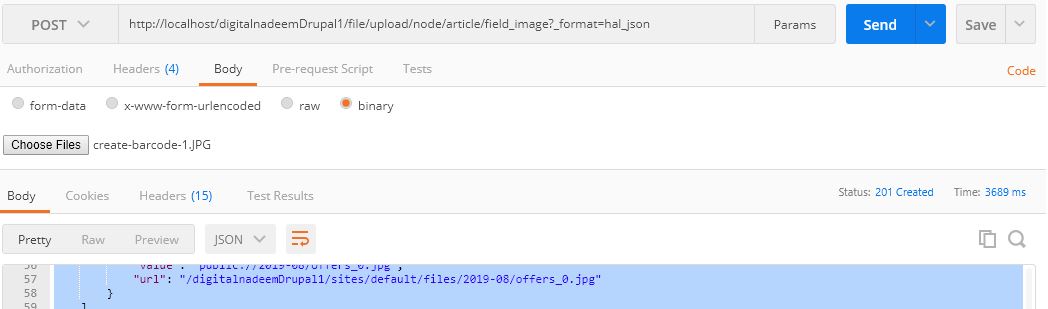
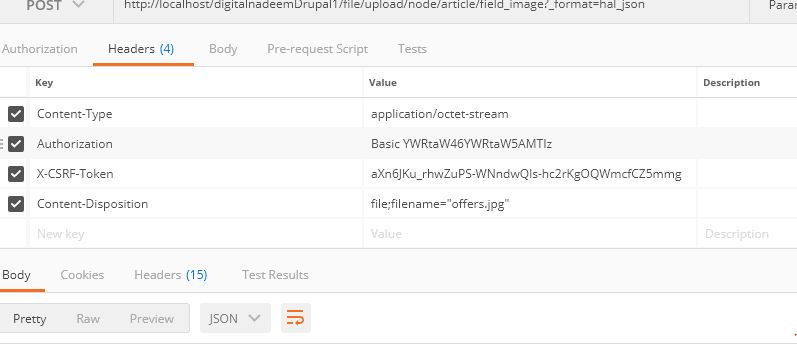
http://localhost/digitalnadeemDrupal1/file/upload/node/article/field_image?_format=hal_json
Content-Type application/octet-stream
X-CSRF-Token aXn6JKu_rhwZuPS-WNndwQls-hc2rKgOQWmcfCZ5mmg
Content-Disposition file;filename=”offers.jpg”
{
"_links": {
"self": {
"href": "http://localhost/digitalnadeemDrupal1/sites/default/files/2019-08/offers_0.jpg"
},
"type": {
"href": "http://localhost/digitalnadeemDrupal1/rest/type/file/file"
},
"http://localhost/digitalnadeemDrupal1/rest/relation/file/file/uid": [
{
"href": "http://localhost/digitalnadeemDrupal1/user/1?_format=hal_json"
}
]
},
"fid": [
{
"value": 2
}
],
"uuid": [
{
"value": "8b8f2d3c-92f7-471c-8480-87c72cd3d2be"
}
],
"langcode": [
{
"value": "en"
}
],
"_embedded": {
"http://localhost/digitalnadeemDrupal1/rest/relation/file/file/uid": [
{
"_links": {
"self": {
"href": "http://localhost/digitalnadeemDrupal1/user/1?_format=hal_json"
},
"type": {
"href": "http://localhost/digitalnadeemDrupal1/rest/type/user/user"
}
},
"uuid": [
{
"value": "7f6726cf-5d7a-481e-ba19-d2996bb582bf"
}
]
}
]
},
"filename": [
{
"value": "offers.jpg"
}
],
"uri": [
{
"value": "public://2019-08/offers_0.jpg",
"url": "/digitalnadeemDrupal1/sites/default/files/2019-08/offers_0.jpg"
}
],
"filemime": [
{
"value": "image/jpeg"
}
],
"filesize": [
{
"value": 74188
}
],
"status": [
{
"value": false
}
],
"created": [
{
"value": "2019-08-23T02:51:01+00:00",
"format": "Y-m-d\\TH:i:sP"
}
],
"changed": [
{
"value": "2019-08-23T02:51:01+00:00",
"format": "Y-m-d\\TH:i:sP"
}
]
}
After getting above attach file id, update your node create API body values as below. In below target_id value is what value received for f_id
"field_image": [

{

"target_id": 2,

"description": "The most fascinating image ever!"

}
This will create a node with files attached to image field. Here field_image is the machine name of my image field in article content type.
most of the developers will try to upload file using base64 encoded form from javascript. it is not really needed. see below example code.
see below html form which has a file upload field.
<body>
<div class="container">

  <h2>Registration</h2>
  <form action="" method="post" name="registration" id = "first_form">

    <input type="file" id="myfile" name="myfile">

    <button type="submit" id="#sbbutton">submit</button>

  </form>
</div>
using simple fetch we can submit files to Rest API. this will provide response with f_id and other details.
var myInput = document.getElementById('myfile');

fetch('http://digitalnadeemlocaltest.com/file/upload/node/article/field_image?_format=json', { // Your POST endpoint
    method: 'POST',
    headers: {
      'Content-Type': 'application/octet-stream',
        'Accept':'application/vnd.api+json',
        'X-CSRF-Token':'1P2L2goyirvpoqFGVqyOloDjlQ9Tc-3CWxcZyGfhEkM',
        'Content-Disposition': 'file; filename="filename.jpg"',
		//'Authorization':'Basic YWRtaW46YWRtaW4xMjM='

    },
    body: myInput.files[0] // This is your file object
  }).then(
    response => response.json() // if the response is a JSON object
  ).then(
    success => console.log(success) // Handle the success response object
  ).catch(
    error => console.log(error) // Handle the error response object
  );
see the complete code of sample html file , here digitalnadeemlocaltest.com is my local project domain.
<!DOCTYPE html>
<html>
<head>
<script src="https://ajax.googleapis.com/ajax/libs/jquery/3.5.1/jquery.min.js"></script>
<title>Title of the document</title>
<script>

$( document ).ready(function() {

$('#first_form').submit(function(e) {
    e.preventDefault();
 var myInput = document.getElementById('myfile');


fetch('http://digitalnadeemlocaltest.com/file/upload/node/article/field_image?_format=json', { // Your POST endpoint
    method: 'POST',
    headers: {
      'Content-Type': 'application/octet-stream',
        'Accept':'application/vnd.api+json',
        'X-CSRF-Token':'1P2L2goyirvpoqFGVqyOloDjlQ9Tc-3CWxcZyGfhEkM',
        'Content-Disposition': 'file; filename="filename.jpg"',


    },
    body: myInput.files[0] // This is your file object
  }).then(
    response => response.json() // if the response is a JSON object
  ).then(
    success => console.log(success) // Handle the success response object
  ).catch(
    error => console.log(error) // Handle the error response object
  );

  });
  });
</script>
</head>
<body>
<div class="container">

  <h2>Registration</h2>
  <form action="" method="post" name="registration" id = "first_form">

    <input type="file" id="myfile" name="myfile">

    <button type="submit" id="#sbbutton">submit</button>

  </form>
</div>

</body>
</html>
provide your X-CSRF-Token headers
Creating a custom Rest resource for Get method
You can create a custom rest resource plug-in in below folder in your custom module.
src->Plugin->{RsourceClassName}.php
{ResourceClass Name} can be any name based on your new plugin, say here RestSample.php.
Here I am going to create RestSample.php in my custom module(digital_nadeem) you can download complete module with custom Rest resource here .
In order to list in Rest UI resource list we have to add @RestResource annotation in RestSample.php file.
/**
* Provides a resource to get view modes by entity and bundle.
*
* @RestResource(
*   id = "rest_sample",
*   label = @Translation("Rest sample"),
*   uri_paths = {
*     "canonical" = "/rest/digitalnadeem/api/get/node/{type}"
*   }
* )
*/
This annotation should be placed just before your class name.
Another important part is canonical URL’s. If you are not mentioning Canonical url Drupal will create canonical url based on your resource id.
I have created below URI path.
 uri_paths = {
"canonical" = "/rest/digitalnadeem/api/get/node/{type}"
}
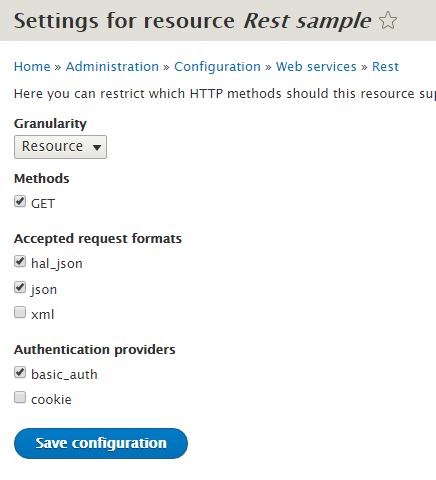
From rest ui screen you can enable your rest resource as below

I have selected below settings for my resource.
See the full source code in RestSample.php
<?php

namespace Drupal\digital_nadeem\Plugin\rest\resource;

use Drupal\rest\ModifiedResourceResponse;
use Drupal\rest\Plugin\ResourceBase;
use Drupal\rest\ResourceResponse;
use Symfony\Component\HttpKernel\Exception\AccessDeniedHttpException;

/**
 * Provides a resource to get view modes by entity and bundle.
 *
 * @RestResource(
 *   id = "rest_sample",
 *   label = @Translation("Rest sample"),
 *   uri_paths = {
 *     "canonical" = "/rest/digitalnadeem/api/get/node/{type}"
 *   }
 * )
 */
class RestSample extends ResourceBase {

  /**
   * Responds to GET requests.
   *
   * @return \Drupal\rest\ResourceResponse
   *   The HTTP response object.
   *
   * @throws \Symfony\Component\HttpKernel\Exception\HttpException
   *   Throws exception expected.
   */
  public function get($type = NULL) {

   // You must to implement the logic of your REST Resource here.
    $data = ['message' => 'Hello, this is a rest service and parameter is: '.$type];

    $response = new ResourceResponse($data);
    // In order to generate fresh result every time (without clearing
    // the cache), you need to invalidate the cache.
    $response->addCacheableDependency($data);
    return $response;
  }

}
Please see below response using post man.
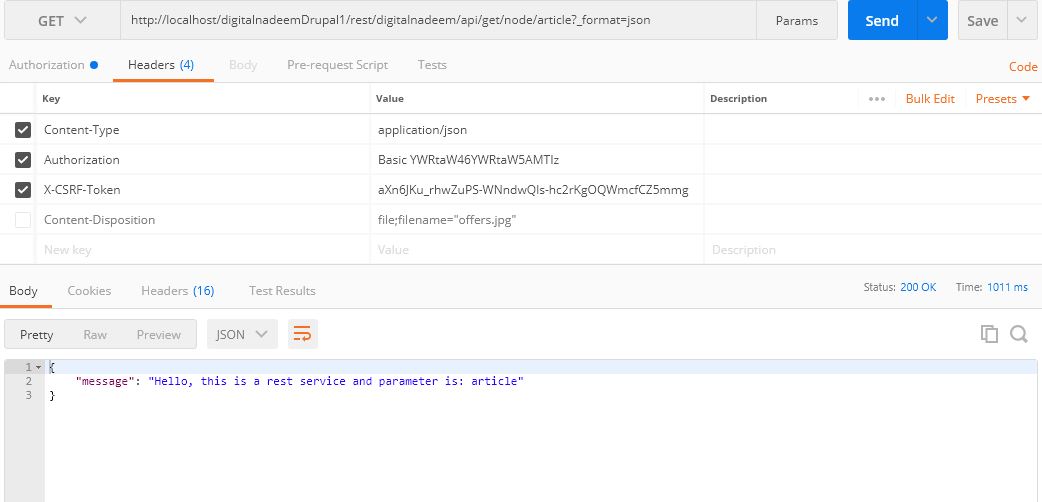
Request URL is http://localhost/digitalnadeemDrupal1/rest/digitalnadeem/api/get/node/article?_format=json
Headers are below
Content-Type : application/json

X-CSRF-Token : aXn6JKu_rhwZuPS-WNndwQls-hc2rKgOQWmcfCZ5mmg

Authorization : Basic YWRtaW46YWRtaW5AMTIz
And output is
{

"message": "Hello, this is a rest service and parameter is: article"

}
If your request is not in proper format , there will be a chance of getting client error
Creating a custom Rest resource for POST method
Next I am going to create an end point for posting data to Rest. I have created RestSamplepost.php file in plugin path
Src->Plugin->RestSamplepost.php
For post method you have to mention link relation in uri_paths . see below code for post.
<?php

namespace Drupal\digital_nadeem\Plugin\rest\resource;

use Drupal\rest\ModifiedResourceResponse;
use Drupal\rest\Plugin\ResourceBase;
use Drupal\rest\ResourceResponse;
use Symfony\Component\HttpKernel\Exception\AccessDeniedHttpException;

/**
 * Provides a resource to get view modes by entity and bundle.
 *
 * @RestResource(
 *   id = "rest_samplepost",
 *   label = @Translation("Rest samplepost"),
 *   uri_paths = {
 *     "https://www.drupal.org/link-relations/create" = "/rest/digitalnadeem/api/post/items"
 *   }
 * )
 */
class RestSamplepost extends ResourceBase {

  /**
   * Responds to POST requests.
   *
   * @return \Drupal\rest\ResourceResponse
   *   The HTTP response object.
   *
   * @throws \Symfony\Component\HttpKernel\Exception\HttpException
   *   Throws exception expected.
   */
  public function post($data) {

   // You must to implement the logic of your REST Resource here.
   $data = ['message' => 'Hello, this is a rest service and parameter is: '.$data->name->value];

    $response = new ResourceResponse($data);
    // In order to generate fresh result every time (without clearing
    // the cache), you need to invalidate the cache.
    $response->addCacheableDependency($data);
    return $response;
  }

}
Drupal 9 change
in Drupal 9 use only “create ” in uri_paths as provided below.
* uri_paths = {
*
* "create" = "/rest/digitalnadeem/api/post/items"
* }
Flush cache and enable resource from Rest UI.

Apply all required settings.
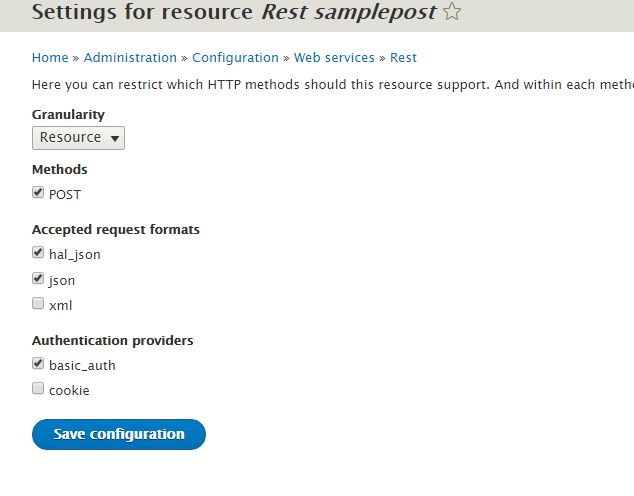
If you are getting any issue with X-CSRF-Token , generate token from which tool you are using. Here I am generated token using Post man by calling a GET request using url http://localhost/digitalnadeemDrupal1/rest/session/token since I have already logged in I got new token.
Now apply you headers as below.

Here Post URL is http://localhost/digitalnadeemDrupal1/rest/digitalnadeem/api/post/items?_format=json
Headers are given below
Content-Type: application/json
X-CSRF-Token: s4l2v7M1rdT5f5RInSDwdo_oHPtuwTviwW-gSFXGMWs
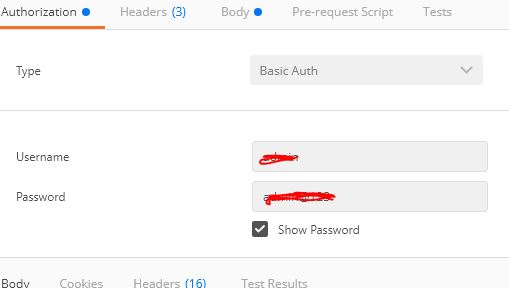
To get Authorization header select basic and provide credentials in Authorization tab
Then select body tab and select rwa option. Provide your parameters as Json text.
Here I am giving as name as key and nadeem as value.
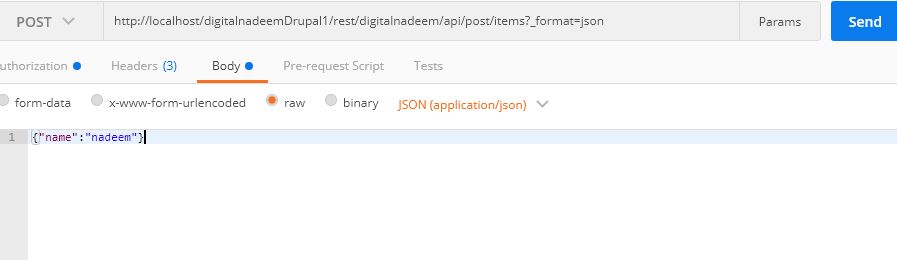
Click Send button. You will get below output.
{

"message": "Hello, this is a rest service and parameter is: nadeem"

}
Now you successfully implemented custom post resource plugin.
You can download digital_nadeem custom module code with above GET and POST resource plugin
From below link.
Download custom module free source code here-(Drupal 8).
Download custom module free source code here-Drupal 9 sample code.
How to set up Cors
there is a chance if your client side app whether it is Angular or react app , which will throw cross-domain origin is not allowed error in browser console. so in that case copy content from /sites/default/default.services.yml and create a new file services.yml in the same directory. Then enable cors and update other portions as below.
cors.config:
    enabled: true
    # Specify allowed headers, like 'x-allowed-header'.
    allowedHeaders: ['x-csrf-token','authorization','content-type','accept','origin','x-requested-with', 'access-control-allow-origin','x-allowed-header','*']
    # Specify allowed request methods, specify ['*'] to allow all possible ones.
    allowedMethods: ['*']
    # Configure requests allowed from specific origins.
    allowedOrigins: ['http://localhost/','http://localhost:3000','http://localhost:3001','http://localhost:3002','*']
    # Sets the Access-Control-Expose-Headers header.
    exposedHeaders: false
    # Sets the Access-Control-Max-Age header.
    maxAge: false
    # Sets the Access-Control-Allow-Credentials header.
    supportsCredentials: true
Read more: How to configure JSON API in Drupal
Read more: Drupal Rest API with paragraph type field