How to configure JSON API module and create web services using JSON API specifications in Drupal

There are two ways to create you can create web services in Drupal. one is using the Core Rest Web service module and the other is using the JSONAPI module.
Here we are going to discuss one of the important modules available in Drupal which is used for creating web services called JSON-API module.
You can read more about the configuration of the Core Rest API module here
In this article we are going to discuss below points
- What is Json API
- When you have to use JSON API over Rest API
- What Json API cant do
- Installation and configuration of JSON API module and JSON API extras module
- Retrieve resources using HTTP GET method
- Post Content with HTTP basic Authentication
- Updating existing resource(PATCH)
- Delete existing resource
- Uploading Files using JSON API
- Logout API
- Fetching multiple resources in a single request using Json include
- Retrieving single resource
- Sorting resource collections
- Filtering
- Filter based on multiple conditions and multi-value fields
Before discussing more about the module, we are going to discuss what is JSON API specification.
What is JSON API?
Json API is a specification for how a client should request a resource that to be fetched or modified, and how a server should respond to those requests
JSON:API is designed to minimize both the number of requests and the amount of data transmitted between clients and servers.
Robust approaches to resource relationships and common query operations such as pagination and sorting
JSON: API requires the use of the JSON: API media type (application/vnd.api+json) for exchanging data.
The below headers should be sent.
Accept: application/vnd.api+json
Content-Type: application/vnd.api+json
Also JSON: API has specific response codes for each type of response. Drupal JSON API uses a subset of that.
- 200 OK – All successful GET and PATCH requests
- 201 Created – All successful POST requests (response includes the newly created resource)
- 204 No Content – All successful DELETE requests
When you have to use JSON API over Rest API
In JSON API by default No configuration/little configuration is possible.
Using the JSON API extras module we will get some more configurations. We are discussing more about this latter in this article.
When enabling the JSON API module a Rest API will be available for every entity type and bundle. This can be accessed from a dedicated URL using HTTP methods.
Resource collections
possibility of retrieving multiple resources using JSON API collections. Simply use a simple URL to load a collection of nodes. But in Core Rest API, you have to use view Export to load all. for example, load all articles using a Get request with URL below
/jsonapi/node/article
You can use different kind of filters here
/jsonapi/node/article?page[limit]=25&page[offset]=25 You can include multiple entities and resources in a single API response, This will reduce the number of requests to the server.
Throughout this article, we are using claro (https://www.drupal.org/project/claro) theme as the administrator theme.
What JSON API can’t do
JSON: API is entirely entity-based. That is, it can’t process business rules or do things which can’t be thought of as “CRUD”. Business logic, like registering a new account, logging in a user, or requesting a new password is not part of JSON: API. Many of these are already provided by Drupal core.
Installation and configuration of JSON API module and JSON API extras module
Navigate to the modules listing page(Extend menu) and enable modules as below.
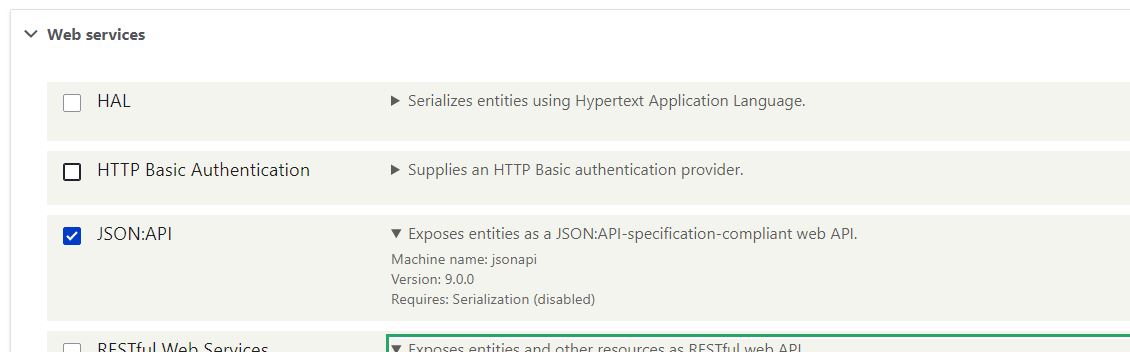
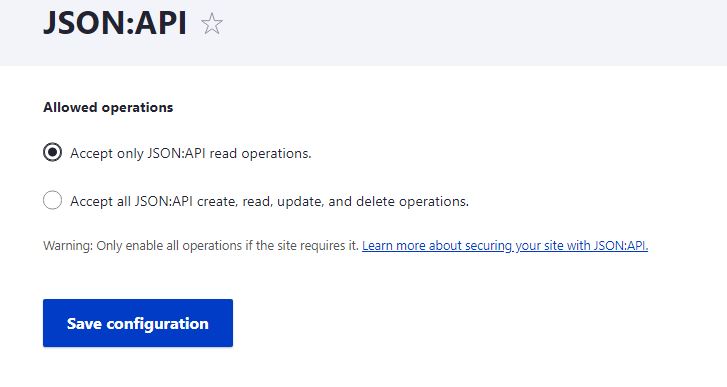
Even though JSON-API module is a non-configurable, you can see below to option in under configuration –>Web services->Json API
http://localhost/drupal9/admin/config/services/jsonapi
JSON API extras module
Json API extras module provides more configurations.
Module link – https://www.drupal.org/project/jsonapi_extras
This module provides below configurations additional to the default configuration of JSON API
- Enable and disable resources.
- Overwrite the name of a resource. Example: article instead of node–article.
- Overwrite the path for a resource: Example: /api/articles instead of /jsonapi/node/article.
- Disable fields.
- Use field aliases. Example: tags instead of field_tags.
- Enhance field output. Example: Use the date_time field enhancer to format date fields.
Go to configuration ->webservices – JSON API
You can see additional tab for Extras configuration.
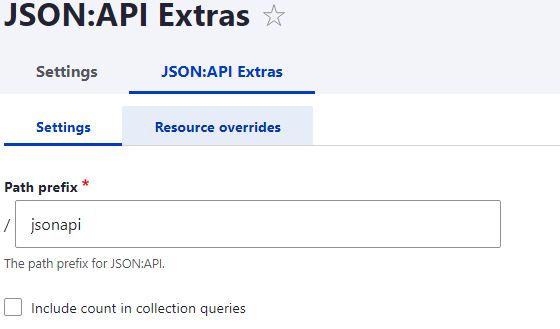
In settings, you can change start URL of API. By default, it will be JSON API.
In the resource override tab, you can see all resources.
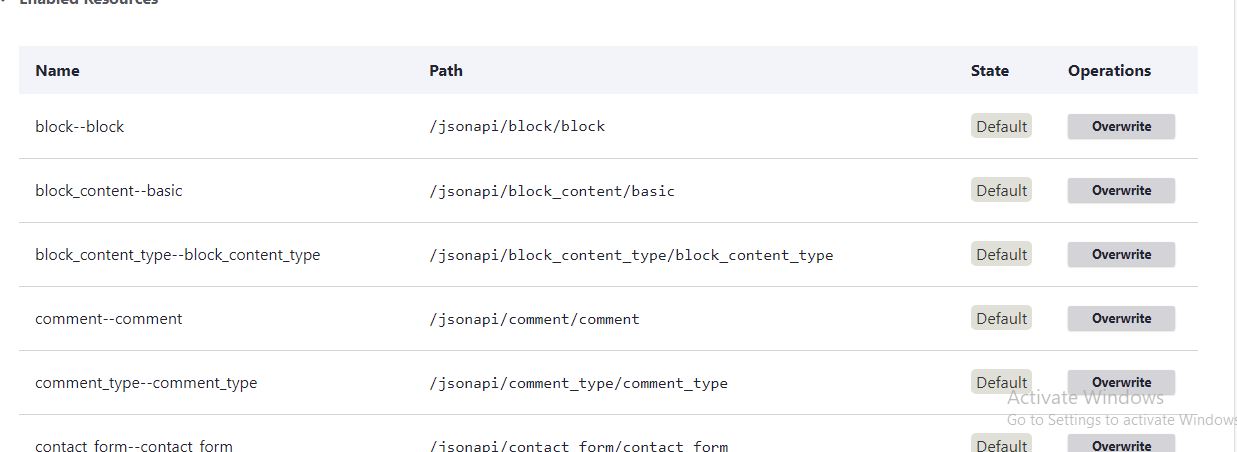
By click on the overwrite button, you can change each resource path and field alias of resources.
By click on advanced, you can further customize each field and we can decide the label name of the field in the response.
Retrieve resources using HTTP GET method
if an anonymous user has read permission for an entity or entity bundle, you can access results by putting URL in the browser or using any API client.
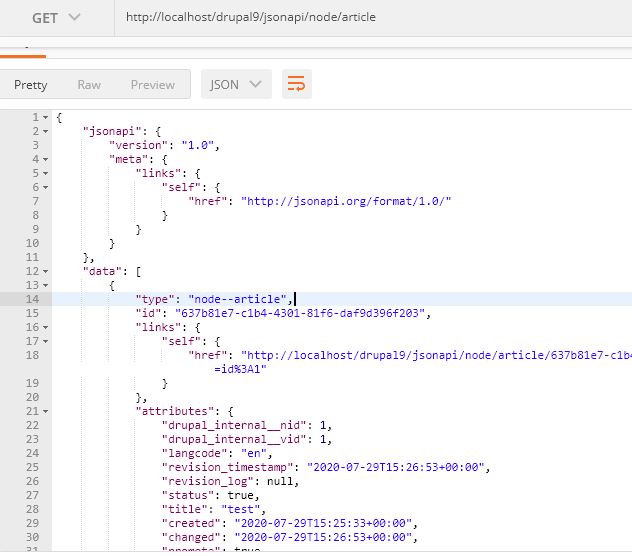
URL – http://localhost/drupal9/jsonapi/node/article
URL with restricted number- http://localhost/drupal9/jsonapi/node/article?page[limit]=5
Here we are displaying contents of type article. Here it will display all published and unpublished nodes. We will discuss later in detail to filter the result based on various conditions.
See the below result in Postman.
Post Content with HTTP basic Authentication
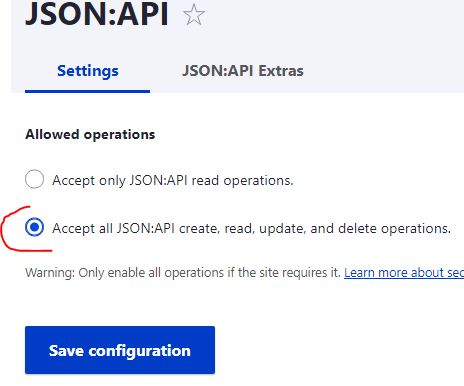
For operations like post/put/delete , we have to do additional configuration.
First, confirm below configuration is enabled.
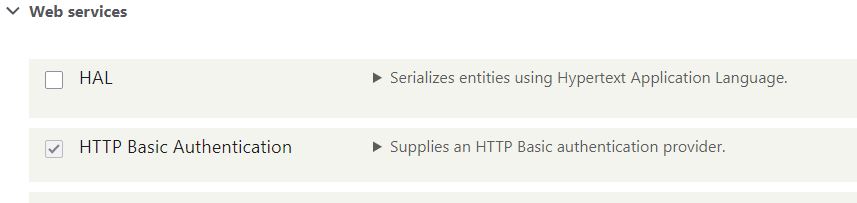
Next, we are going to enable HTTP Authentication.
Next, we need to create a new role and assign a user to this role.
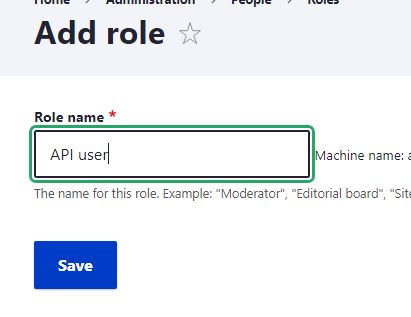
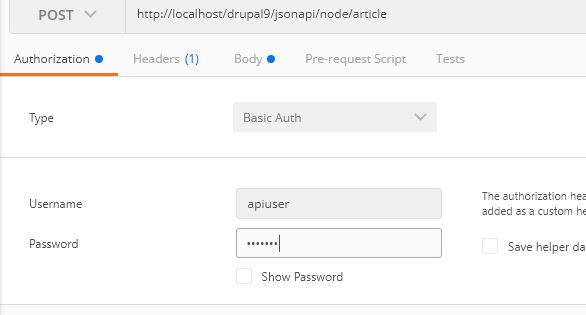
I have created new user with user name – apiuser and assigned roles API user to this user
Also Enable Article:Create content permission for this particular user.

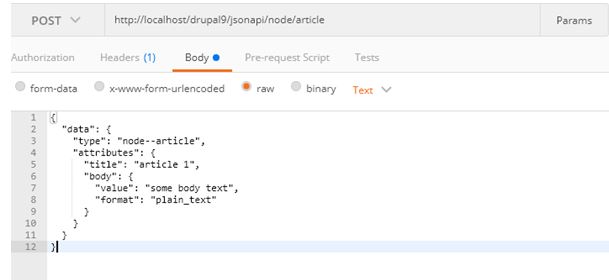
Open your postman again and provide below as body text.
{
  "data": {
    "type": "node--article",
    "attributes": {
      "title": "article 1",
      "body": {
        "value": "some body text",
        "format": "plain_text"
      }
    }
  }
}
And for authentication, provide newly created apiuser details in Authorization tab.
As a post response, you will receive newly created content details in data objects.
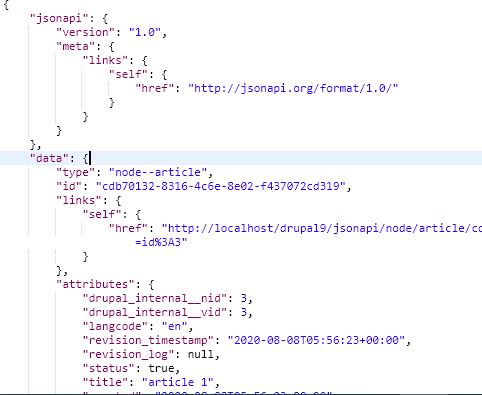
So at the backend, you can see newly created content.
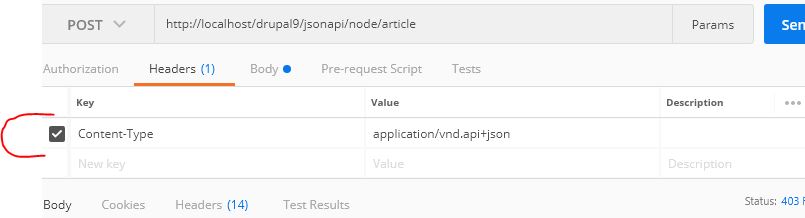
Content type header
Make sure your content type header is as provided below.
application/vnd.api+json
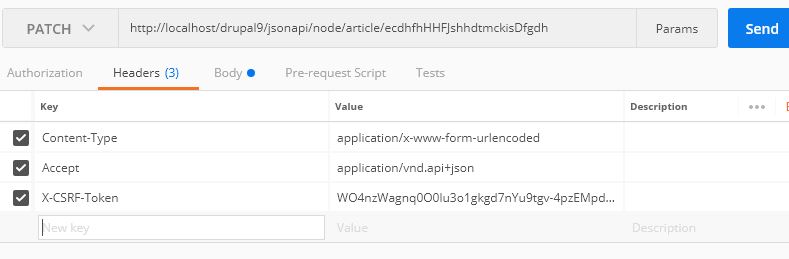
Updating existing resource(PATCH)
We need to pass resource id to update a resource. So here for updating article content we have to pass article UUID. You can get UUID from the results of /jsonapi/node/article or you can get Devel tab of edit article node.
You can download devel module from drupal.org – https://www.drupal.org/project/devel
URL- http://localhost/drupal9/jsonapi/node/article/{UUID}
Headers
Request body
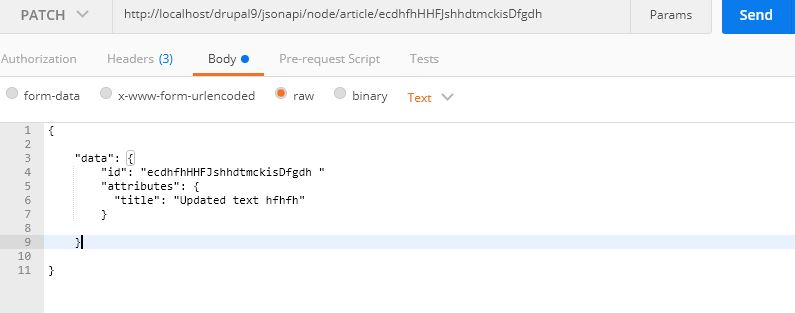
You will receive a response with updated article details.
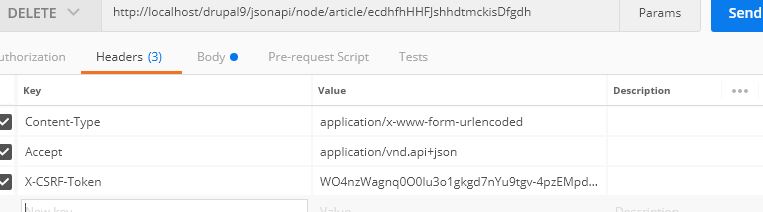
Delete existing resource
URL- http://localhost/drupal9/jsonapi/node/article/{UUID}
Just pass the UUID with authentication headers or Xcrsf token header.
Confirm whether resource is being deleted or not from the admin content http://localhost/drupal9/admin/content
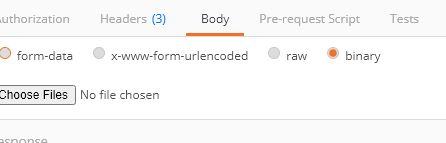
Uploading Files using JSON API
In order to upload files we are first going to generate CSRF token. This needed as a request header while sending files. Here we are testing this using javascript code. we are not using POST man here. We can easily test file upload using post man because it has a file browse option as shown below.
GET CSRF token
http://localhost/drupal9/user/login?_format=json
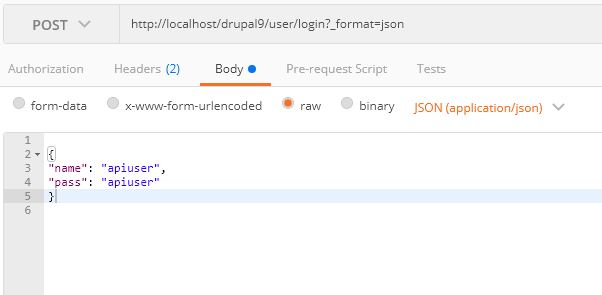
Response
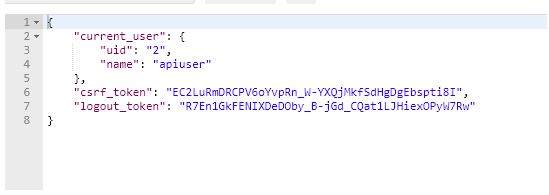
Token
“csrf_token”: “EC2LuRmDRCPV6oYvpRn_W-YXQjMkfSdHgDgEbspti8I”,
If you try to login again, you will get 403 – access denied. You either need to logout or clear the SESSIONS table.
There are a lot of issues reported in the community while uploading an image. All will follow the below method where users will see a blank image at the back end.
POST /jsonapi/node/article/field_image HTTP/1.1
Content-Type: application/octet-stream
Accept: application/vnd.api+json
Content-Disposition: file; filename="filename.jpg"

[… binary file data …]
So the back end in /admin/content page Files tab image will look as below
![]()
The basic reason for this issue is many people equating Binay with base 64. Actually we don’t want to convert to base6 4 while sending it to the server. You can directly send a file object to the server.
See below the working code where I am uploading the file.
If you are using Jquery/any other javascript plugin , use fetch() to call API.
HTML code
<div class="container">

  <h2>Registration</h2>
  <form action="" name="registration" id = "first_form">

    <input type="file" id="myfile" name="myfile">

    <button type="submit" id="#sbbutton">Register</button>

  </form>
</div>

</body>
</html>
Javascript code
$(document).ready(function() {


  $('#first_form').submit(function(e) {
    e.preventDefault();
 var myInput = document.getElementById('myfile');

fetch('http://localhost/drupal9/jsonapi/node/article/field_image', { // Your POST endpoint
    method: 'POST',
    headers: {
      'Content-Type': 'application/octet-stream',
        'Accept':'application/vnd.api+json',
        'X-CSRF-Token':'cSbA_qr3OPsC3zGqQvaYgDnDARX85u56QBIUQXq7Lrs',
        'Content-Disposition': 'file; filename="filename.jpg"'
    },
    body: myInput.files[0] // This is your file object
  }).then(
    response => response.json() // if the response is a JSON object
  ).then(
    success => console.log(success) // Handle the success response object
  ).catch(
    error => console.log(error) // Handle the error response object
  );

  });
});
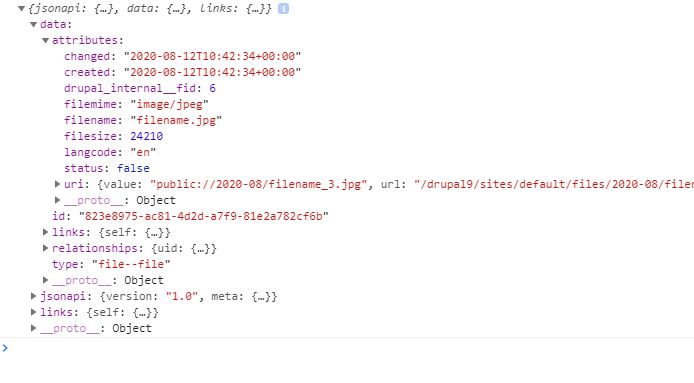
In admin content you can see uploaded file in the files tab.

This is a kind of temporary storage. You have to use files file id received in response with entity add API.
The response of the file upload will be as below.
Now I am going to create new article with this file id.
http://localhost/drupal9/jsonapi/node/article
in the body of the request include file id as well.
{
"data": {
"type": "node--article",
"attributes": {
"title": "Testing1"
},
"relationships": {
"field_image": {
"data": {
"type": "file--file",
"id": "196b64a8-8e1d-459a-a29f-7da378d97239",
"meta": {
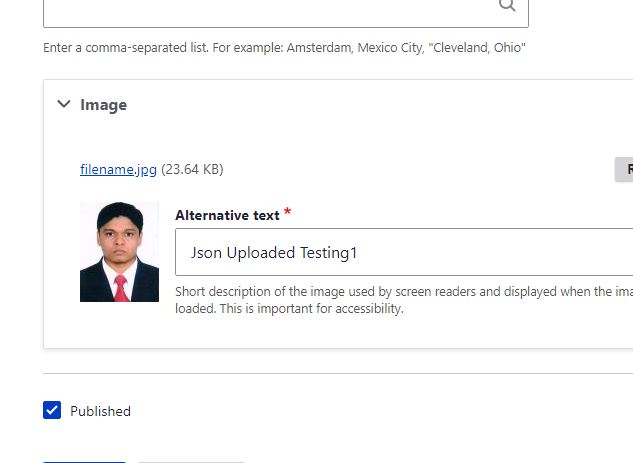
"alt": "Json Uploaded Testing1",
"title": "Json Uploaded Testing1",
"width": null,
"height": null
}
}
}
}
}
}
Provide headers as below.

You can see below the success response with created node details.
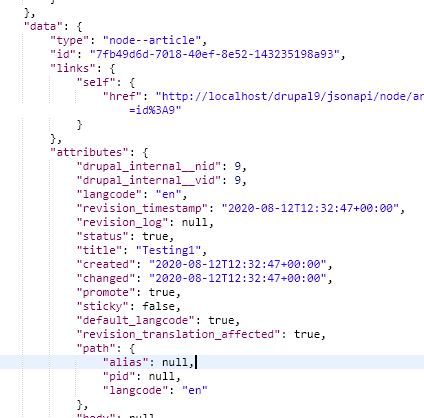
See the below content with the image at the backend.
Logout API
you can logout from Drupal using the logout token you received during login.
Just use the below URL as a GET request.
http://localhost/drupal9/user/logout?_format=json&token=AP8VlRYJFTsigj_V8pvNu0TF-dy5wd99kpYyYpOwmcI
- {siteurl}/user/logout?_format=json&token=dBqI0_DaAQUHZodxzpkDJcpI5D_hVJPRxXj12UNk5aU
- Success is an HTTP Response code. Your SESSIONS record is now deleted and you can log in again.
Fetching multiple resources in a single request using Json include
include parameter allows to include relationships and avoid additional requests.
For example, using a single request you will get the article title and authors and comments details.
{
  "data": [{...}]
  "included": [{
    "type": "user",
    "id": "another-random-uuid",
    "attributes": {
      "name": "c0wb0yC0d3r"
    }
  }]
}
URL- GET /jsonapi/node/article?include=uid
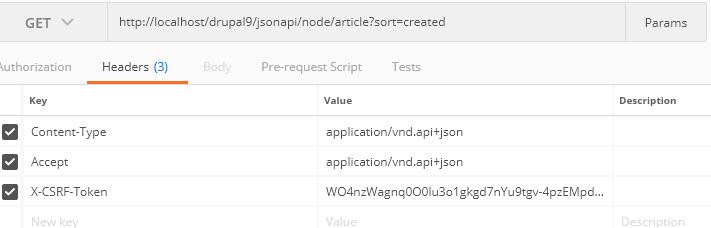
Provide headers as shown below
- Accept: application/vnd.api+json·
- Content-Type: application/vnd.api+json
The following header is needed for the examples to work:
· Authorization: Basic YXBpOmFwaQ==
If you have already X-CSRF-Token you can send it in the header instead of providing Authorization for each request.
Retrieving single resource
using a simple GET request you can retrieve a single resource.
URL – /jsonapi/node/article/{{node_uuid}}
Sorting resource collections
You can easily sort results of getting requests using sort parameters. See below example of article entity types with sorted based on created date.
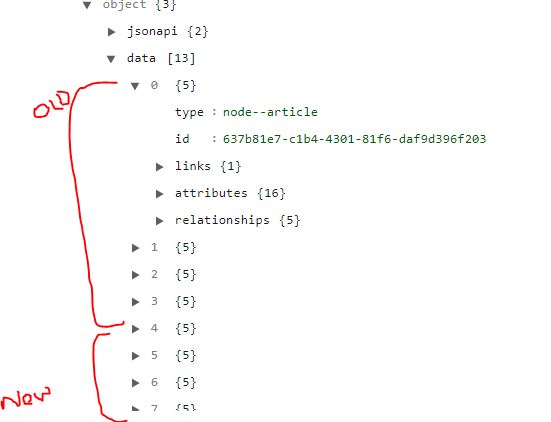
In response, the data object will be having all articles sorted based on the created date. Old articles will be at the beginning and the newly created article will be at the end of the data object.
In my case, have 13 articles and it will be in order as provided below.
Use minus sign to get latest at the beginning of the items in data object. Minus sign makes result in descending order.
http://localhost/drupal9/jsonapi/node/article?sort=-created
you can use multiple sorting option as below
http://localhost/drupal9/jsonapi/node/article?sort=uid.name,created
uid.name sorts based author username ascending order. You can use the minus sign to get results in descending order.
Filtering
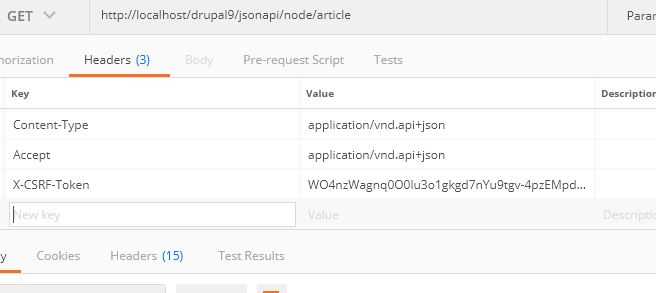
Normally while calling API url /jsonapi/node/article you are receiving all the articles. So this endpoint is called unfiltered collection endpoint. So here we need to provide filter parameters with different conditions to reduce response size.
Here we are applying the first simple filter options.
Filter and show published content.
Parameter – API URL – ?filter[status][value]=1
In the below case, the response will contain all published and unpublished articles.
In my case around 13 articles, details will be there in response.
We can display only published articles using the filter as shown below.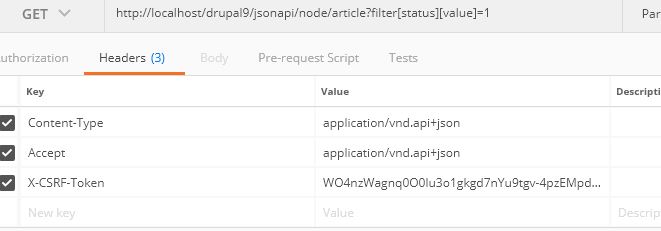
The response has six articles that are in published status.
Filter by author user name
?filter[uid.name][value]=admin
Here admin is the user name.
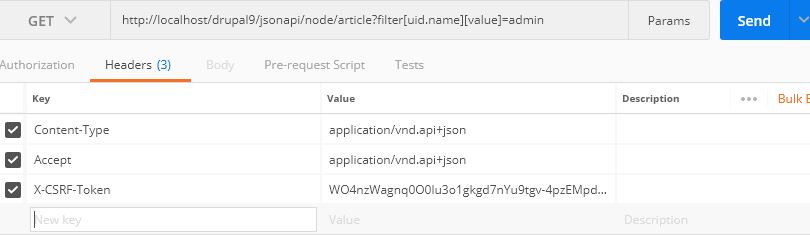
And the result will contain only articles authored by user admin.
Filter based on multiple conditions and multi-value fields
Here we are going to apply multiple filters with AND and OR conditions.
First, we are going to check two conditions with AND. That is we want to display article content that is published and the author user name is admin.
So our condition will be as provided below.
WHERE user.name = admin AND node.status = 1;
So our request Url will be as below. We are going to discuss each line and what is and-group here in detail in this section.
http://localhost/drupal9/jsonapi/node/article?filter[and-group][group][conjunction]=AND
&filter[name-filter][condition][path]=uid.name
&filter[name-filter][condition][value]=admin
&filter[name-filter][condition][memberOf]=and-group
&filter[status-filter][condition][path]=status
&filter[status-filter][condition][value]=1
&filter[status-filter][condition][memberOf]=and-group
See the below request in postman.
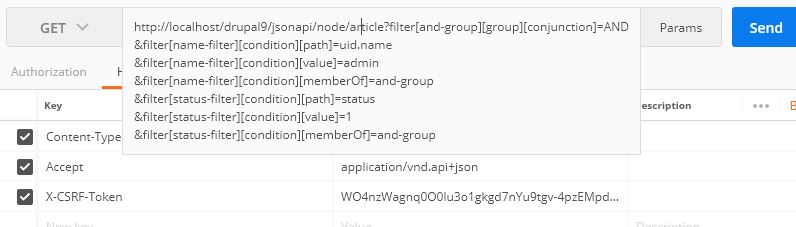
Result will contain article content which is published and author user name is admin,
Now we are going to discuss in detail how this filters forms.
Conjuction will be either OR or AND.
and-group and or –group used for grouping conditions like brackets in normal statements.
In our case our statement can be written as below.
WHERE ( (user.name = admin )AND (node.status = 1;))
- Create a AND group
filter[and-group][group][conjunction]=AND
- Create admin filter and put in AND group
filter[name-filter][condition][path]=uid.name
filter[name-filter][condition][value]=admin
filter[name-filter][condition][memberOf]=and-group
- Create a status filter and put in And the group
filter[status-filter][condition][path]=status
filter[status-filter][condition][value]=1
filter[status-filter][condition][memberOf]=and-group
another example is shown below
WHERE (user.name = admin) AND (node.sticky = 1 OR node.promoted = 1)
See below how we can create filter options for the above statement.
# Create an AND and an OR GROUP
filter[and-group][group][conjunction]=AND
filter[or-group][group][conjunction]=OR

# Put the OR group into the AND GROUP
filter[or-group][group][memberOf]=and-group

# Create the admin filter and put it in the AND GROUP
filter[admin-filter][condition][path]=uid.name
filter[admin-filter][condition][value]=admin
filter[admin-filter][condition][memberOf]=and-group

# Create the sticky filter and put it in the OR GROUP
filter[sticky-filter][condition][path]=sticky
filter[sticky-filter][condition][value]=1
filter[sticky-filter][condition][memberOf]=or-group

# Create the promoted filter and put it in the OR GROUP
filter[promote-filter][condition][path]=promote
filter[promote-filter][condition][value]=1
filter[promote-filter][condition][memberOf]=or-group
see below some of the most used filters.
Filter for nodes where ‘title’ CONTAINS “Foo”
filter[title][operator]=CONTAINS&filter[title][value]=Foo
Filtering on Taxonomy term values (e.g. tags)
filter[taxonomy_term--tags][condition][path]=field_tags.name
filter[taxonomy_term--tags][condition][operator]=IN
filter[taxonomy_term--tags][condition][value][]=tagname
Filtering on Date (Date only, no time)
This example is for a Date field that is set to be date only (no time).
filter[datefilter][condition][path]=field_test_date
filter[datefilter][condition][operator]=%3D
filter[datefilter][condition][value]=2019-06-27
This example is for a Date field that supports date and time.
filter[datefilter][condition][path]=field_test_date
filter[datefilter][condition][operator]=%3D
filter[datefilter][condition][value]=2019-06-27T16%3A00%3A00
Note that timestamp fields (like created or changed) currently must use a timestamp for filtering:
filter[recent][condition][path]=created
filter[recent][condition][operator]=%3D
filter[recent][condition][value]=1591627496