How to create custom Rest API end point for creating node with file upload

Here we are going to discuss about how to create a custom Rest API resource which programmatically create a node.
There are in built restful web service available in Drupal 8 and Drupal 9. You can read full article here.
But some cases suppose if you want to apply some custom business logic on node creations , you need create your own Rest resources which will create node with fields programmatically.
First enable Restful web service module in Core module list, Also download and install Rest UI module.

Here we are using below sample code ,
https://www.digitalnadeem.com/product/rest-custom-get-and-post-end-point-drupal-9-sample-code/
Drupal 8 – https://www.digitalnadeem.com/product/rest-custom-get-and-post-end-point/
Download above module and install it.
Under Configuration -> Web services
Click on Rest.
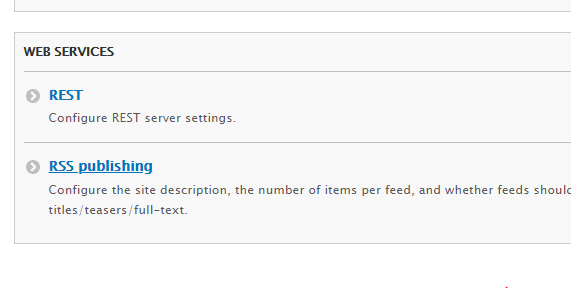
Enable below resources.

Also configure Authentication methods and other configurations.

Now you have a rest API end point where you can post data with parameters
http://YOUR_PROJECT/rest/digitalnadeem/api/post/items?_format=json
Here our sample module have below folder structure.
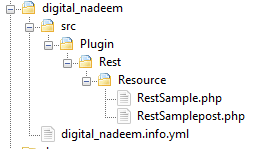
Here we are going to write our node creation code in RestSamplepost.php
Provide below code in post function , this will create an article content.
$data1 = ['message' => 'Hello, You have created  article: '.$data["title"]];

   //=====programatically create node
				 $contentType  = 'article';
					$node = Node::create(['type' => $contentType]);
					//$node->langcode = "fr";
					$node->uid = 1;
					$node->promote = 0;
					$node->sticky = 0;
					$node->title=  $data["title"];
					$node->body = $data["body"];
					$node->field_image = ['target_id' => $data["fid"]];

					$node->save();
					$nid = $node->id();
   //=====programatically create node

    $response = new ResourceResponse($data1);
    // In order to generate fresh result every time (without clearing
    // the cache), you need to invalidate the cache.
    $response->addCacheableDependency($data1);
    return $response;
This will create a article content with title , body content and image.
Here you can see we are receiving fid for image file.
SO fist we need to upload image using Rest API already available in Restfull webservice.
Here we have a basic html file outside Drupal project. See below html form .
<h2>Registration</h2>
  <form action="" method="post" name="registration" id = "first_form">
     <label>Article Title</label>
	  <input type="text" name="title" id="title" value="">
	   <label>Body text</label>
	   <textarea id="body" name ="body"></textarea>
    <input type="file" id="myfile" name="myfile">
    <input type="hidden" name="fid" id="fid" value="">
	<label>Uploaded File ID</label><span id="fidText">  </span>
    <button type="submit" id="#sbbutton">submit</button>

  </form>
First we need to upload file and get fid.
Place below code inside script tag of same html file.
$("input:file").change(function (){
       var fileName = $(this).val();
       console.log("File selected=="+fileName );
	    var myInput = document.getElementById('myfile');

		fetch('http://YOUR_PROJECT/file/upload/node/article/field_image?_format=json', { // Your POST endpoint
			method: 'POST',
			headers: {
			  'Content-Type': 'application/octet-stream',
				'Accept':'application/vnd.api+json',
				'X-CSRF-Token':'1P2L2goyirvpoqFGVqyOloDjlQ9Tc-3CWxcZyGfhEkM',
				'Content-Disposition': 'file; filename="filename.jpg"',
				//'Authorization':'Basic YWRtaW46YWRtaW4xMjM='

			},
			body: myInput.files[0] // This is your file object
		  }).then(
			response => response.json() // if the response is a JSON object
		  ).then(
			success => {
			document.getElementById("fidText").textContent = success.fid[0]['value'];
			document.getElementById("fid").value = success.fid[0]['value'];
			console.log(success.fid[0]['value']);
			}
		  ).catch(
			error => console.log(error) // Handle the error response object
		  );


     });
For generating X-CRF token , refer this article.
SO here click on brows button , on select image, file will be uploaded to the server and , receive details like fid , so in tag <span id=”fidText”> </span> you can see uploaded files f_id
In our RestSamplepost.php, you can see our custom Rest API URL is /rest/digitalnadeem/api/post/items
You can get this from below section
“create” = “/rest/digitalnadeem/api/post/items”
Provide below code in form submit handler.
$('#first_form').submit(function(e) {
    e.preventDefault();
 //var myInput = document.getElementById('myfile');

     // submit data to custom API.
	 var body = $("#body").val();
	 var title = $("#title").val();
	 var fid = $("#fid").val();
	 var formData = JSON.stringify($("#first_form").serializeArray());
	 var obj = '{"title":"'+title+'","body":"'+body+'","fid":"'+fid+'"}';
	 console.log(obj);
	 fetch('http://YOUR_PROJECT/rest/digitalnadeem/api/post/items?_format=json', { // Your POST endpoint
			method: 'POST',
			headers: {
			  'Content-Type': 'application/json',
				'X-CSRF-Token':'1P2L2goyirvpoqFGVqyOloDjlQ9Tc-3CWxcZyGfhEkM'

			},
			body: obj // This is your file object
		  }).then(
			response => response.json() // if the response is a JSON object
		  ).then(
			success => {
			   console.log("inserted successfully");
			}
		  ).catch(
			error => console.log(error) // Handle the error response object
		  );

  });
SO here I have placed my html fie inside Drupal project folder
/ProJect_Folder/test/file_upload.html
See the complete code of this html file.
<!DOCTYPE html>
<html>
<head>
<script src="https://ajax.googleapis.com/ajax/libs/jquery/3.5.1/jquery.min.js"></script>
<title>Title of the document</title>
<script>

$( document ).ready(function() {
 $("input:file").change(function (){
       var fileName = $(this).val();
       console.log("File selected=="+fileName );
	    var myInput = document.getElementById('myfile');

		fetch('http://digitalnadeemlocaltest.com/file/upload/node/article/field_image?_format=json', { // Your POST endpoint
			method: 'POST',
			headers: {
			  'Content-Type': 'application/octet-stream',
				'Accept':'application/vnd.api+json',
				'X-CSRF-Token':'1P2L2goyirvpoqFGVqyOloDjlQ9Tc-3CWxcZyGfhEkM',
				'Content-Disposition': 'file; filename="filename.jpg"',
				//'Authorization':'Basic YWRtaW46YWRtaW4xMjM='

			},
			body: myInput.files[0] // This is your file object
		  }).then(
			response => response.json() // if the response is a JSON object
		  ).then(
			success => {
			document.getElementById("fidText").textContent = success.fid[0]['value'];
			document.getElementById("fid").value = success.fid[0]['value'];
			console.log(success.fid[0]['value']);
			}
		  ).catch(
			error => console.log(error) // Handle the error response object
		  );


     });
$('#first_form').submit(function(e) {
    e.preventDefault();
 //var myInput = document.getElementById('myfile');

     // submit data to custom API.
	 var body = $("#body").val();
	 var title = $("#title").val();
	 var fid = $("#fid").val();
	 var formData = JSON.stringify($("#first_form").serializeArray());
	 var obj = '{"title":"'+title+'","body":"'+body+'","fid":"'+fid+'"}';
	 console.log(obj);
	 fetch('http://digitalnadeemlocaltest.com/rest/digitalnadeem/api/post/items?_format=json', { // Your POST endpoint
			method: 'POST',
			headers: {
			  'Content-Type': 'application/json',
				'X-CSRF-Token':'1P2L2goyirvpoqFGVqyOloDjlQ9Tc-3CWxcZyGfhEkM'

			},
			body: obj // This is your file object
		  }).then(
			response => response.json() // if the response is a JSON object
		  ).then(
			success => {
			   console.log("inserted successfully");
			   alert("Article created");
			}
		  ).catch(
			error => console.log(error) // Handle the error response object
		  );

  });
  });
</script>
</head>
<body>
<div class="container">

  <h2>Registration</h2>
  <form action="" method="post" name="registration" id = "first_form">
     <label>Article Title</label>
	  <input type="text" name="title" id="title" value="">
	   <label>Body text</label>
	   <textarea id="body" name ="body"></textarea>
    <input type="file" id="myfile" name="myfile">
    <input type="hidden" name="fid" id="fid" value="">
	<label>Uploaded File ID</label><span id="fidText">  </span>
    <button type="submit" id="#sbbutton">submit</button>

  </form>
</div>

</body>
</html>
Replace digitalnadeemlocaltest.com with your project name.
So you can run the html fie as below.
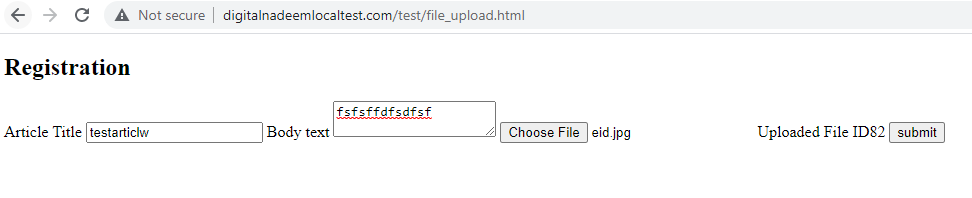
After submission you can see newly created article page with title, body and image fields in /admin/content page.
Download sample module digital_nadeem and html file here.