How to configure workflow contributed module in Drupal

In this article, I am explaining about the workflow module available in the Drupal community as a contributed module. As we already know Drupal Core has one workflow module which provides basic workflows. If you need a basic workflow you can go for that. But workflow module available in the community has some more features and provides more flexibility if there are more than three roles and more number of states involved in the workflow.
You can see a comparison between different workflow modules here.
Core Workflows and contributed core Workflow must be similar in their general goal but provides different widgets and architecture. The contributed module is a little complicated compared to the Core workflow. But if you have more than three roles in workflow and also there are a lot of workflows and states this module is the ideal one. You can easily control the permission of roles and can control transitions using a user-friendly UI.
Download and install workflow contributed module from the community (https://www.drupal.org/project/workflow).
Install all modules under workflow.
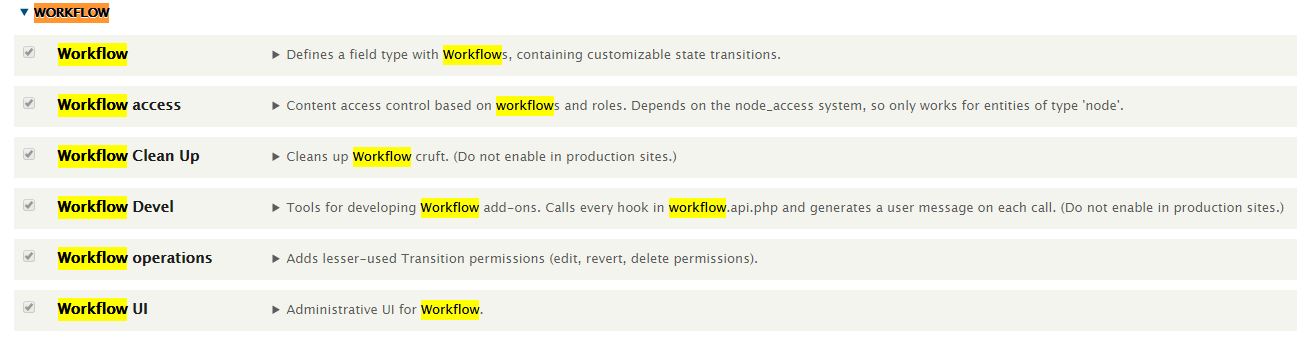
You can administer workflow from Administration > Configuration > Workflow,
URL -/admin/config/workflow

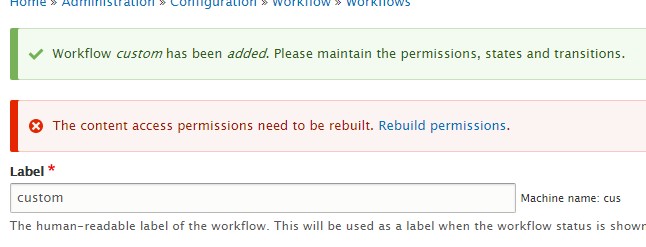
You can see the existing workflows. One of the advantages here you can create multiple workflows here and assign that workflows to the corresponding content type. here workflows are assigned to content type by creating a workflow field.
By default, there will be an Editorial workflow with ID and label.
You can create your own workflow by click on Add workflow
http://localhost/digitalnadeemDrupal1/admin/config/workflow/workflow/add
you can see workflow labels and other options.
You can also see options for choosing how do you want to show workflow state in the form.

Enter values and click the save button.
Here I created a custom workflow names it as custom.
So after creating a workflow, you have to rebuild permissions.
Next, we are going to see how states and transitions are in this module
Click on the Edit button of any workflow. You can see multiple tabs with various options. Here we are explaining much-needed options.
we are going to discuss the below points related to the workflow module in this article.
- States and State Transitions
- Assign to content type
- Permissions
- Workflow Notification
States and State Transitions
Under the state’s tab, you can add multiple states. You can also arrange the order of the states.
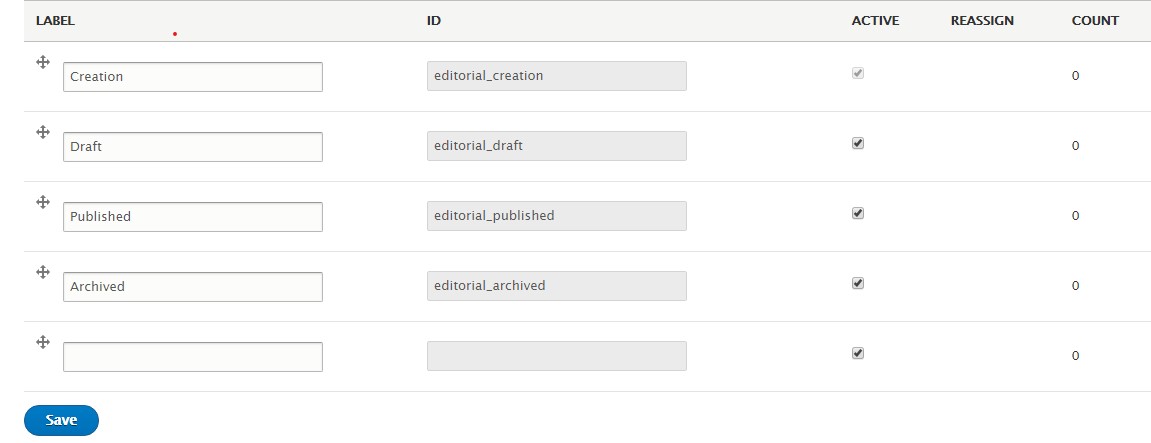
You have to select the Active checkbox in order to appear state in the workflow.
Under the transitions tab, you can see a table with column header and row headers state labels and table cells list roles that have permission to participate in this workflow.
![]()
For appearing roles in this list you have to enable Editorial: Participate in workflow Permission. The Editorial is the workflow name.
This table showing possible transitions between states. The state is shown in the left column; the state to be moved to is to the right. You can select roles that can move sates on the right side.
For example, in the below image, you can see Author can create a page and move sate to draft. Also, only administrators can move from Draft to Published and Draft to Archived.
![]()
After applying selections hit save configuration button,
Under transition labels, you can also provide labels for each transition. You have to select roles in transitions then only you will see all transitions in transition labels. Here I am naming based on from which state to which state content is moved.
![]()
These labels will be shown in the content add/update form.
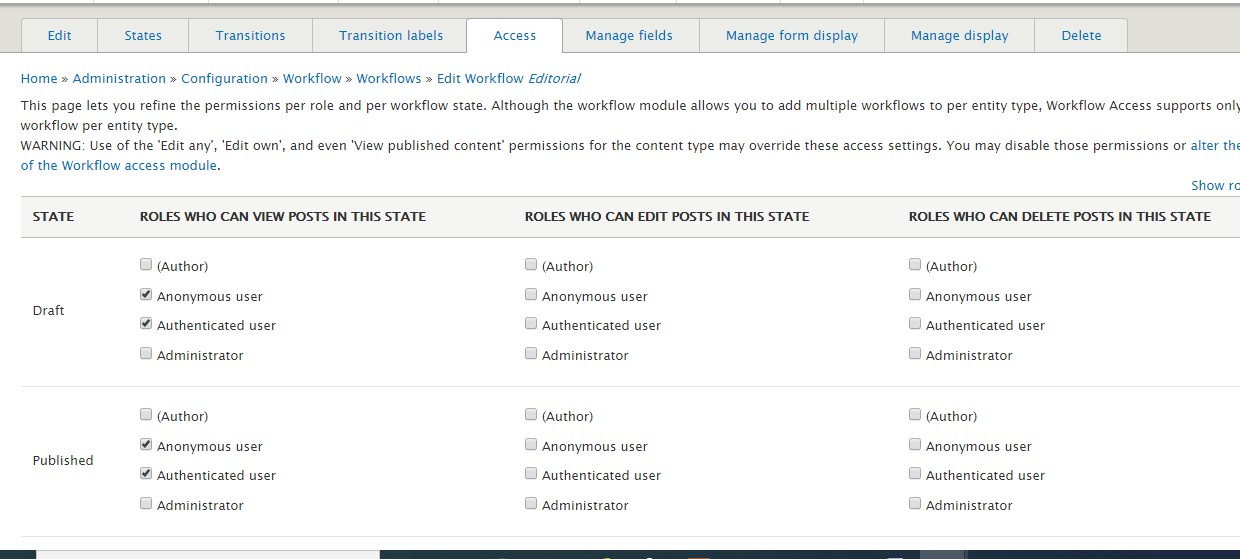
Another important thing is the access tab. You can specify which role have edit/delete/view permission in each state.
One of the advantages of this module is we can add custom fields under manage fields. It is an advanced option but most of the cases it is not needed.
Assign to content type
Here we will see how we are going to assign a workflow to content type
Select your content type click on add fields.
Select workflow state as a new field.
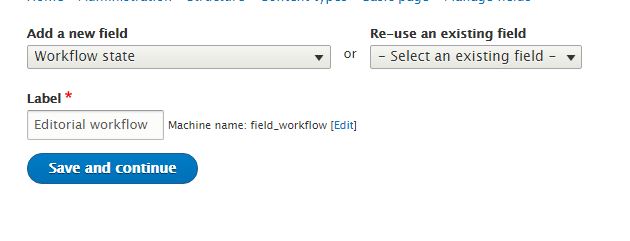
In the next screen select your workflow that to be assigned to this content type.
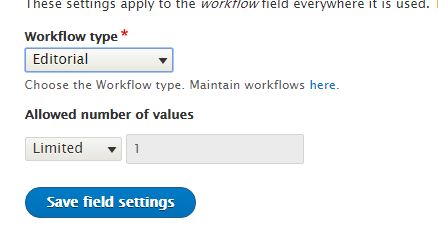
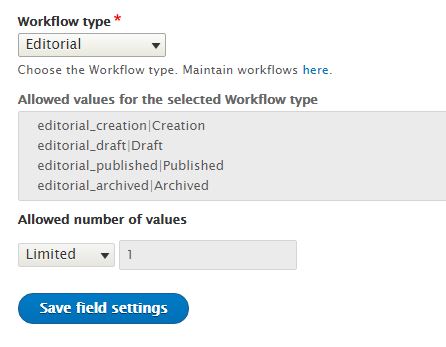
In field settings, you can see allowed values in the workflow.
And save. Now you can see the Editorial workflow field in your content type.
While creating content you can select to which target state you want to move the state of the content. You can also see the workflow comment box.

You can move the existing node to different on the edit page as shown above. Also in view mode, you can update state as shown below using transition form. This form is displayed on the right side of your node.
![]()
Permissions
In this module permissions for each role are set in access and transition tabs of workflow. So in Drupal common permission page you can see only participate in the workflow permission option. If you enable this, that particular role will be shown in access and transitions tabs of the workflow. So while editing any of these values in workflow needs rebuild permissions.
Also, permissions in the workflow access tab will over right edit /delete permission settings configured in Drupal common permissions page
Workflow Notification
This is a contributed module and extends the contributed workflow module. This module is used for sending emails while state changes. A new tab will appear in admin panel where you can create your mail templates.
Module URL https://www.drupal.org/project/workflow_notifications

Conclusion
Contributed workflow module provides more configuration options, which allows implementing any complex workflow in for content moderation. I suggest trying this module before going for the Core workflow module and workbench module.