How to customize results of views using view templates in Drupal 8 and 9

As you know, views are used for listing content by applying various filters with out writing code.
Every developer has to modify these results in order to fit to their customized themes. Here we are going to discuss about how to rewrite results of a views using view templates. Here we are creating view templates for views. We will retrieve each field value before rendering to the page and add mark ups as required.
You can see front page view and other views available under menu Structure->views
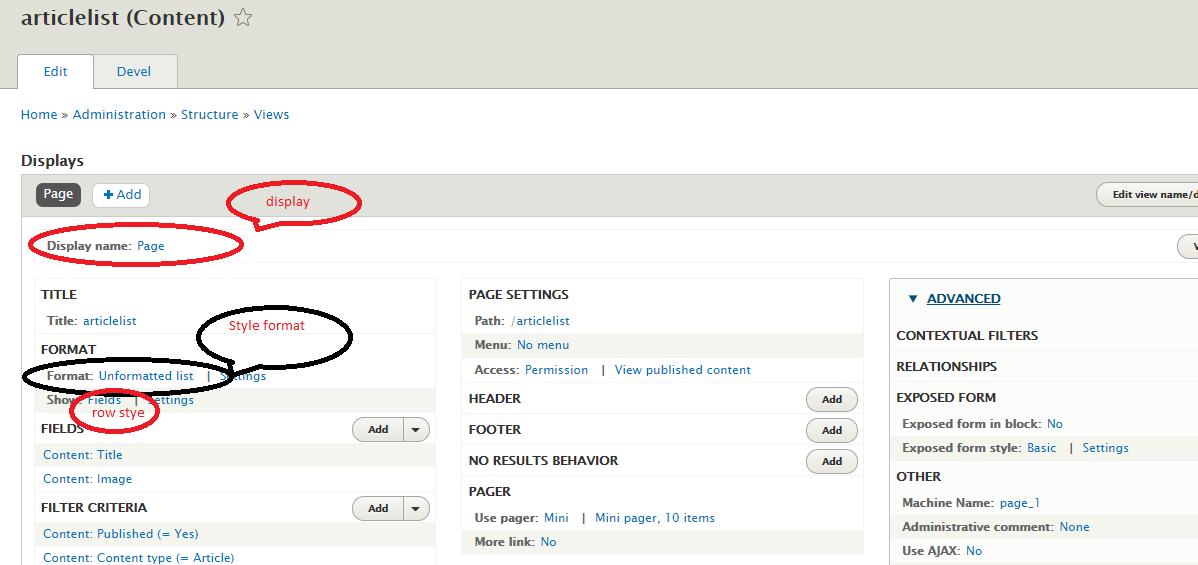
Here we are creating a view say articlelist which displays articles.
Here out view name is articlelist , style selected as unformatted , display selected as page and row style selected as field.
We can control display of the view results using view templates.
Below provided possible templates for this particular view.
- views-view–articlelist–page.html.twig
- views-view–page.html.twig
- views-view–articlelist.html.twig
- views-view.html.twig
- views-view-unformatted–articlelist–page.html.twig
- views-view-unformatted–page.html.twig
- views-view-unformatted–articlelist.html.twig
- views-view-unformatted.html.twig
- views-view-fields–articlelist–page.html.twig
- views-view-fields–page.html.twig
- views-view-fields–articelist.html.twig
- views-view-fields.html.twig
First, we are going to create template file for views rendering.
So, go to views-view.html.twig file from classy theme and copy the content.
\core\themes\classy\templates\views\views-view.html.twig
Then create a template file for our articlelist vew as below in themes/YOURTHE/templates/views folder.
views-view–articlelist.html.twig
so content of this file will be as below.
{# /** * @file * Theme override for a main view template. * * Available variables: * - attributes: Remaining HTML attributes for the element. * - css_name: A CSS-safe version of the view name. * - css_class: The user-specified classes names, if any. * - header: The optional header. * - footer: The optional footer. * - rows: The results of the view query, if any. * - empty: The content to display if there are no rows. * - pager: The optional pager next/prev links to display. * - exposed: Exposed widget form/info to display. * - feed_icons: Optional feed icons to display. * - more: An optional link to the next page of results. * - title: Title of the view, only used when displaying in the admin preview. * - title_prefix: Additional output populated by modules, intended to be * displayed in front of the view title. * - title_suffix: Additional output populated by modules, intended to be * displayed after the view title. * - attachment_before: An optional attachment view to be displayed before the * view content. * - attachment_after: An optional attachment view to be displayed after the * view content. * - dom_id: Unique id for every view being printed to give unique class for * JavaScript. * * @see template_preprocess_views_view() */ #} {% set classes = [ 'view', 'view-' ~ id|clean_class, 'view-id-' ~ id, 'view-display-id-' ~ display_id, dom_id ? 'js-view-dom-id-' ~ dom_id, 'custom-class' ] %} <div{{ attributes.addClass(classes) }}> {{ title_prefix }} {% if title %} {{ title }} {% endif %} {{ title_suffix }} {% if header %} <div class="view-header"> {{ header }} </div> {% endif %} {% if exposed %} <div class="view-filters"> {{ exposed }} </div> {% endif %} {% if attachment_before %} <div class="attachment attachment-before"> {{ attachment_before }} </div> {% endif %} {% if rows %} <div class="view-content"> {{ rows }} </div> {% elseif empty %} <div class="view-empty"> {{ empty }} </div> {% endif %} {% if pager %} {{ pager }} {% endif %} {% if attachment_after %} <div class="attachment attachment-after"> {{ attachment_after }} </div> {% endif %} {% if more %} {{ more }} {% endif %} {% if footer %} <div class="view-footer"> {{ footer }} </div> {% endif %} {% if feed_icons %} <div class="feed-icons"> {{ feed_icons }} </div> {% endif %} </div>
We can confirm our article list view is rendering through this template by placing a class name in set classes. Using this template you can add additional classes and mark ups outside rows.
View field template
You can override specific view field template like:
views-view-field–{views machine name}–{page or block machine name}–{field name}.html.twig
For Example, title field of frontpage view can be overwritten using below template.
views-view-field–frontpage–page-1–title.html.twig
Here we are going to over right each fields in view and adding a mark up to the fields. Here we have article list view, so we are going to over right view title field
Create below file in YOUR_THEME_FOLDER/templates/views/
views-view-field–articlelist–page-1–title.html.twig
you can refer below template for creating custom mark ups.
\core\modules\views\templates\views-view-fields.html.twig
Copy above file content to views-view-field–articlelist–page-1–title.html.twig
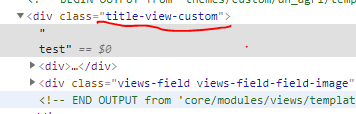
Now you can add div to the title filed as below.
<div class="title-view-custom">
{{ output -}}
<div>
Flush the cache and access http:/yourproject.com/articlelist
You can see title is enclosed in newly added div.
Same way we can do for image field also. Here in article list view I have made image field to display a URL to image.
Getting each field in views-view-fields—VIEWNAME –page.html.twig
Here our template will be as below.
views-view-fields–articlelist–page.html.twig
you can refer below template for rendering each fields
\core\modules\views\templates\views-view-fields.html.twig
Here I am getting each field( title and image fields)value as below.
<div class="cust-fields"><span>{{ fields.title.content }},</span><span>{{ fields.field_image.content }}</span></div>
Flush the cache and open view front end , you can see class cust-fields in loaded page.
You can load available fields using kint as below.
{{ kint(fields) }}
Rendering fields in views-view-unformatted–yourviewname.html.twig
Here I have below template
\themes\custom\YOUR_THEME\templates\views\views-view-unformatted–articlelist.html.twig
You can refer below template for default mark ups.
\core\modules\views\templates\views-view-unformatted.html.twig
By default it has below code.
{% if title %}
  <h3>{{ title }}</h3>
{% endif %}
{% for row in rows %}
  {%
    set row_classes = [
      default_row_class ? 'views-row',
    ]
  %}
  <div{{ row.attributes.addClass(row_classes) }}>
    {{- row.content -}}
  </div>
{% endfor %}
Place this in your code and remove {{- row.content -}}
Now we can get each fields from row as below
{{row.content[‘#row’]._entity.MECHINE_NAME_OF_FIELD.value}}
For example for title, image and body fields it will be as provided below.
{{row.content['#row']._entity.title.value}}
{{file_url(row.content['#row']._entity.field_image.entity.uri.value)}}
{{row.content['#row']._entity.body.value}}
Read related article – Drupal Twig tutorial